JSON panels
What are JSON panels?
JSON panels allow Pipedrive users to see and use the data from your app directly inside Pipedrive in the form of a panel.
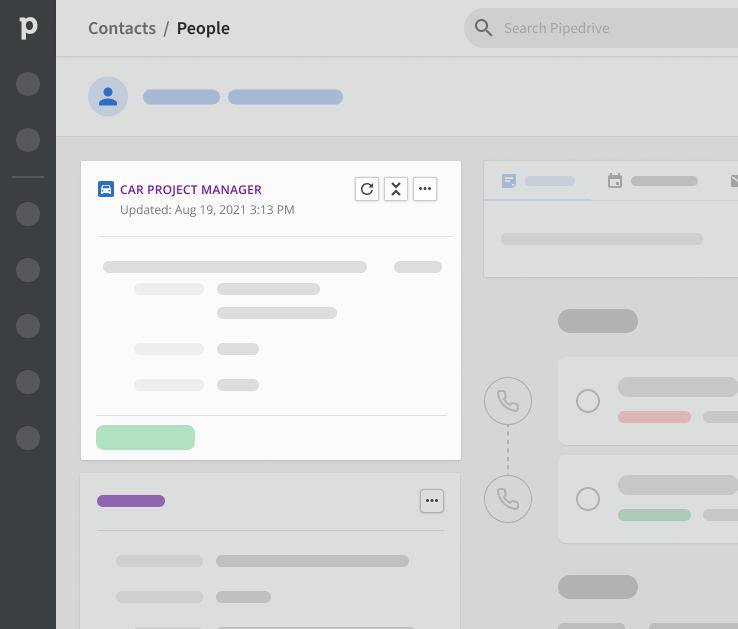
JSON panel in the Pipedrive web app
Terminology
JSON panels – An entrance point for an app’s data and interactivity inside Pipedrive in a panel format
Object – A JSON panel object is a data entry point with multiple descriptive fields displayed inside a panel. A panel can contain multiple objects.
Object actions menu – A white “actions” button with an arrow pointing downwards at the object’s top right. It features a dropdown menu that gives access to link(s) or JSON modal(s). Object actions are specific to the object itself and only available for multiple object panels.
Field – Descriptive data field in a particular format within the object
Field action – A link or JSON modal that allows the user to interact with the data inside the field. The action is specific to the field itself.
Global actions – A green action button at the bottom of the JSON panel. It features one main link action and a dropdown menu if there are multiple app actions and/or an external link.
Actions menu – A dropdown menu accessible from the three dots symbol on the top of the panel. The menu allows the user to manage the left sidebar, adjust panel and app settings, and access the same app action(s) as the one(s) defined in global actions.
Visibility in the UI
JSON panels can be found in the form of a panel in the left sidebar inside the detail view of deals, people, and organizations. The JSON panel will appear at the top of the left sidebar, and its location can be changed, hidden, and reordered with other sections in the sidebar.
Each app is allocated 1 JSON or custom panel per detail view. Considering the three detail views (deal, people, and organization), each app can have three different app panels (JSON or custom).
Structure of a JSON panel
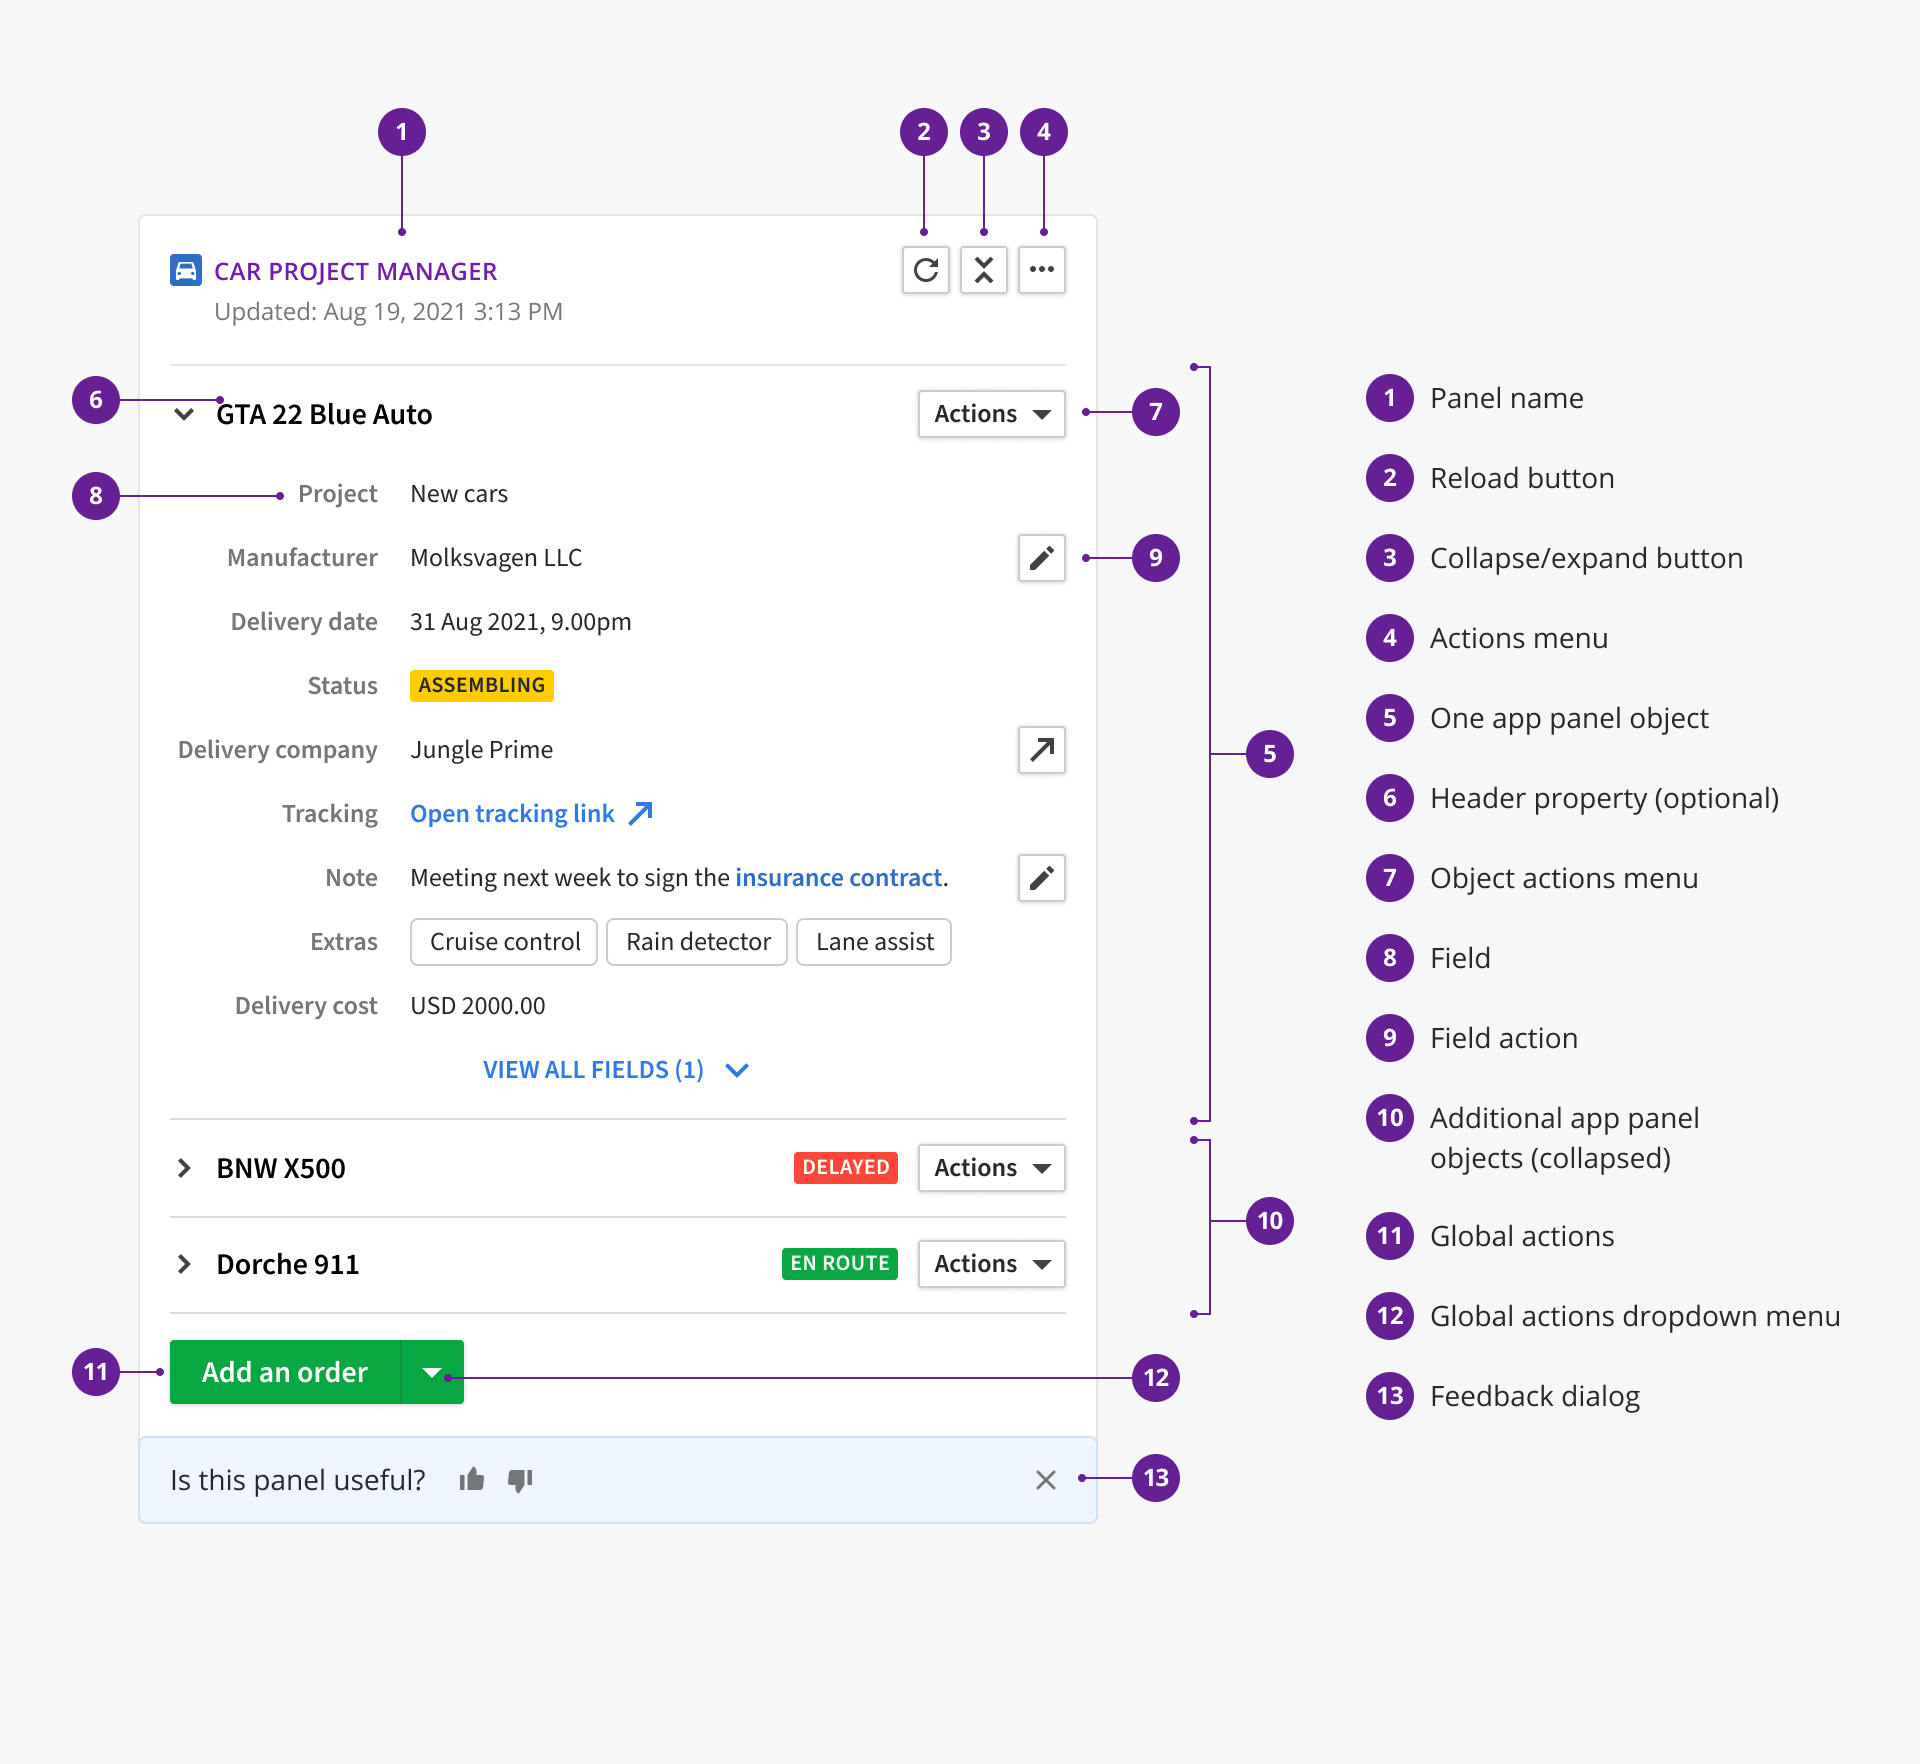
Structure of the JSON panel
Top of the JSON panel
The JSON panel header has three icons next to the panel name: the reload button, the collapse/expand button, and the actions menu.
Reload button – Enables the user to reload information that is pulled from your app
Collapse/expand button – Enables the user to collapse/expand the panel manually
Actions menu – Enables the user to access a dropdown menu that contains a link to manage the left sidebar, adjust app and panel settings and access app-specific app actions. App-specific app actions are app actions that belong only to your app.
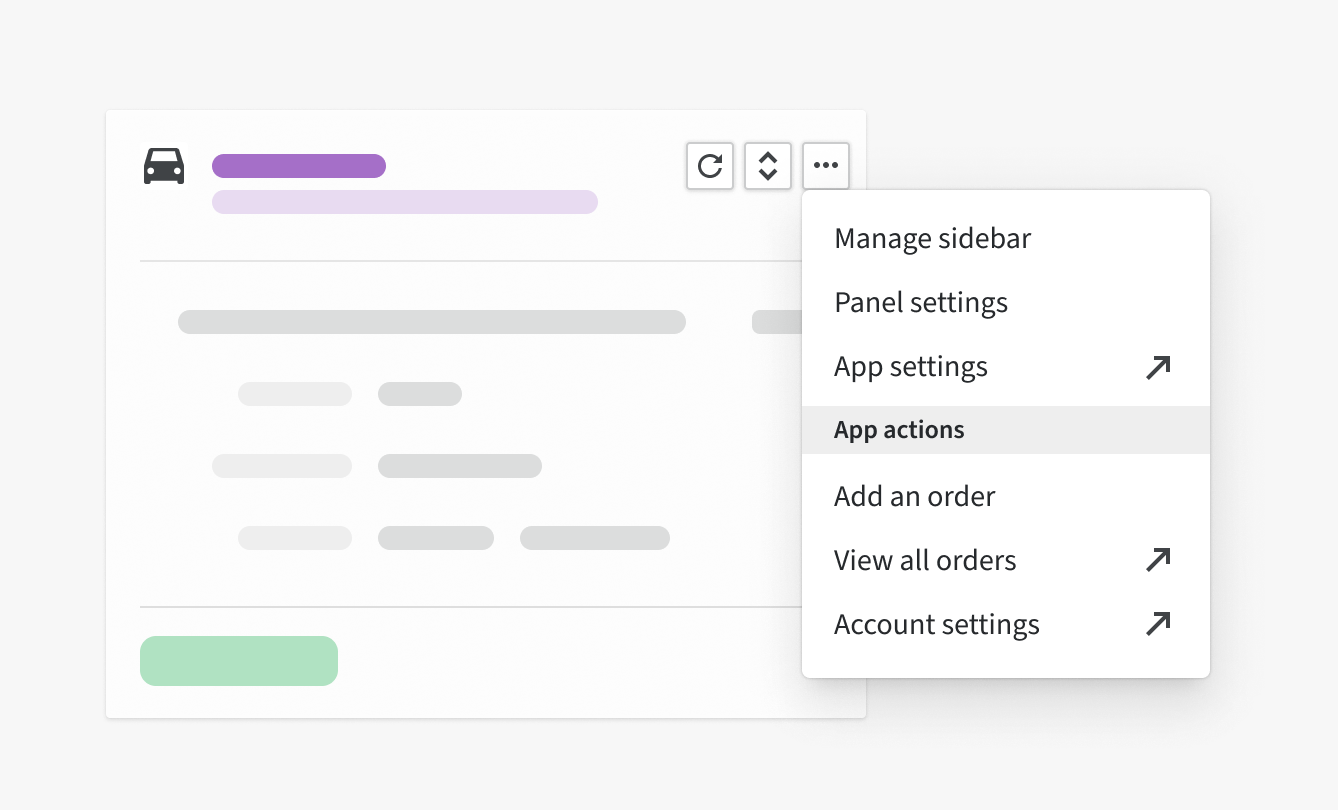
Top of the JSON panel
Body of the JSON panel
A JSON panel body can consist of objects (multiple object panels) or fields (single object panels). Each JSON panel can display a maximum of 10 objects, while each object can display a maximum of 20 fields along with a header and field data.
The panel’s objects and fields are defined by the JSON schema that’s added in the JSON panel form inside Developer Hub > App extensions.
JSON panels can be interactive with the addition of object actions and field actions. Learn more about it here.
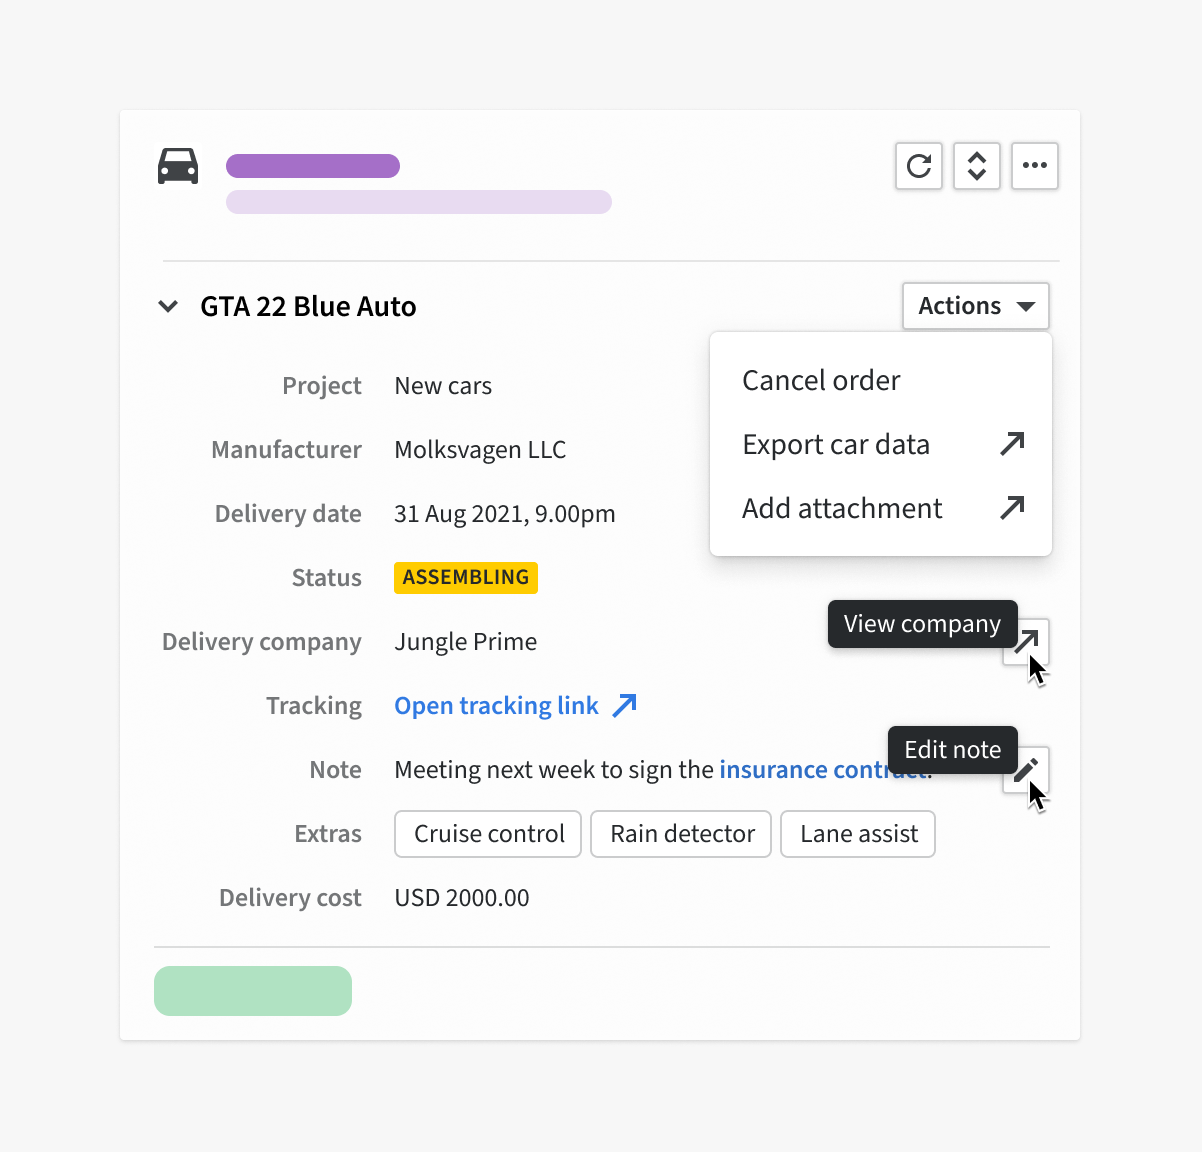
Body of the JSON panel
Footer of the JSON panel
The footer of the JSON panel contains two items: global actions and feedback dialog.
Global actions
At the bottom left of the JSON panel, global actions are represented by a green action button. This is where the user can find one main app action that is featured and a dropdown menu if there are multiple app actions and/or an external link. These app actions are app-specific.
The order of global actions can be customized based on your app users’ needs. More details about it here.
Feedback dialog
The feedback dialog is a light blue box with a thumbs up and a thumbs down symbol that lets users give you direct feedback about your app. Feedback will be sent to the main contact email specified in the App review info tab inside Developer Hub.
If a user gives a “thumbs down”, it is mandatory for them to answer “what features are missing” in the message box. If the user gives a “thumbs up”, they can choose to leave a message. Users may also close the feedback dialog without giving any feedback.
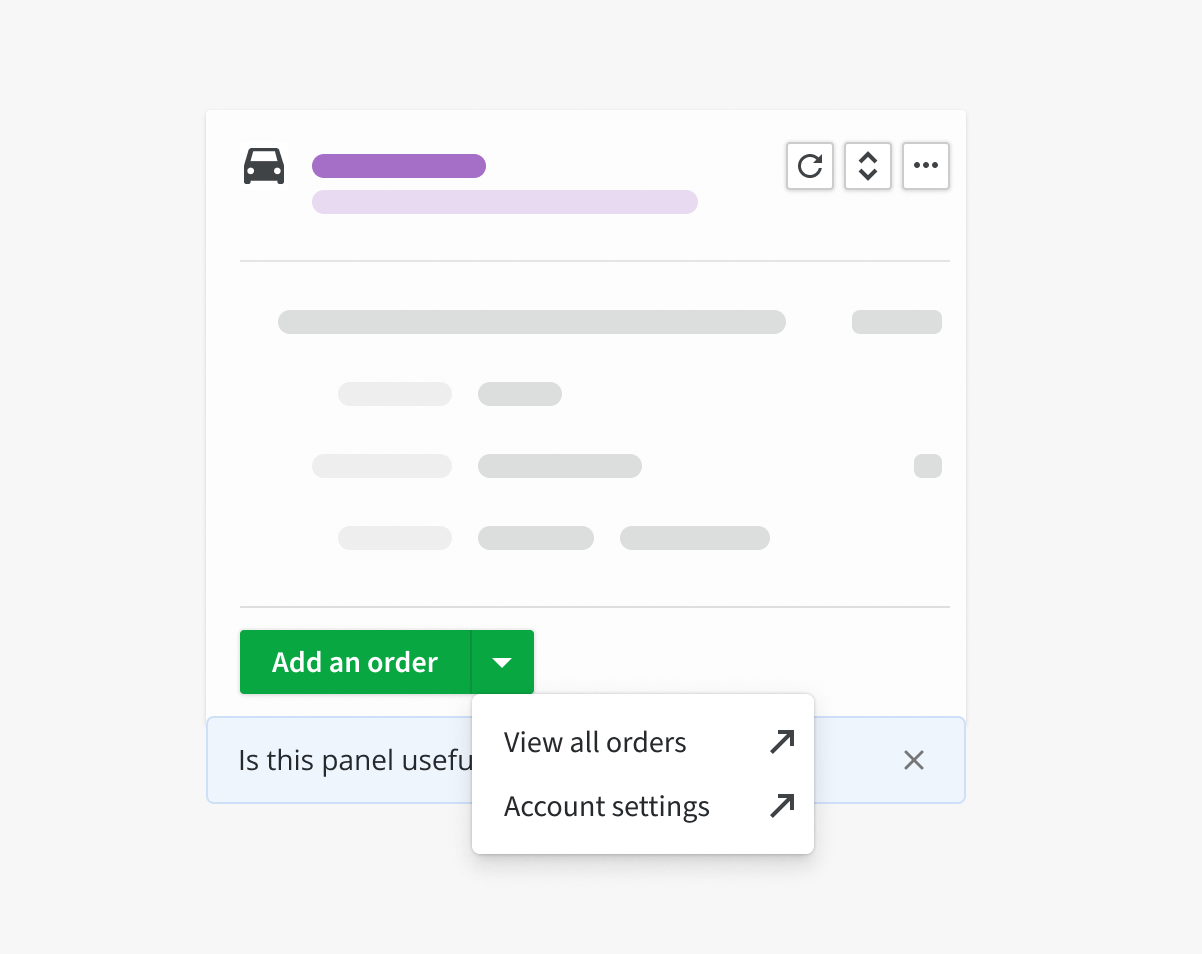
Footer of the JSON panel
How does a JSON panel work?
When the page or a panel is reloaded, we will renew the information by requesting information from the API endpoint you provided in the JSON panel form inside Developer Hub > App extensions.
You will receive an HTTP request to your API with a basic authentication header (defined in Developer Hub as HTTP Auth username and password) or with a JWT and query parameters (described in the table below).
If it takes more than 10 seconds to receive the response, the app panel will display a “Something went wrong…” error message.
These are the parameters that are added to the API endpoint’s URL if you are using basic authentication:
Parameter | Explanation or value(s) | Examples |
|---|---|---|
| deal/person/organization |
|
| details |
|
|
| |
|
| |
| Entity ID that shows the ID of the selected entity |
|
|
|
|
| This token is for verification purposes. It is used to verify that the request came from a specific user/company in Pipedrive. The token can be decoded with either the panel’s JWT secret or |
|
Actions in panels
Actions in panels allow you to add interactivity to your JSON panel. App actions can be added for the entire panel, the object itself and individual fields. Learn more about it here.
Panel settings
Panel settings can be found by clicking on the actions menu in the top right of the JSON panel.
Expand/collapse
By default, a JSON panel is set to expand/collapse manually. In panel settings, users can choose to auto-expand or auto-collapse the panel based on filters for each detail view – deals, people, organizations.
Ordering of fields
In your JSON panel, you can present your own default view of fields based on what you make available. The user can decide to change the order and presentation of the fields via panel settings.
Key steps to adding a JSON panel
-
Plan out your use case
-
Map your use case with the most suitable fields and panel actions for your JSON panel – see adding a JSON panel and actions in panels for more details and sample JSON schema templates.
-
Create the JSON schema for your JSON panel. Validation of the schema will be done in Developer Hub.
-
Configure an API endpoint on your side to respond to Pipedrive’s request. The endpoint should be able to respond/return different sets of data based on the user’s input choices.
-
Add relevant panel actions to your JSON panel. Depending on the type of action (link or JSON modals), different aspects need to be filled out. See more details in actions in panels.
Keep in mind: if you already have a live app, please create another test app for testing your panel and/or panel actions.
JSON panels in app approval process
What if my app has already been approved?
If you already have an app or an integration available in the Pipedrive Marketplace, please create a new test app to develop the JSON panels and ensure they work properly.
Remember that any changes saved when updating a public app in Developer Hub will immediately be visible to your app users.
What to consider when submitting JSON panels?
In the header of the JSON panel are your app’s icon and the name of the JSON panel. The icon and the JSON panel’s name can be added to your app’s listing in Developer Hub. Since your app’s icon will be displayed next to the title of the JSON panel and will be minimized, please consider how recognizable your icon is when it’s displayed in the JSON panel.
Updated 3 months ago
